When designing or constructing a basketball court, the most important first step is creating an accurate basketball court drawing. Whether you’re planning a school court, community court, or professional-grade sports arena, a detailed court layout ensures correct dimensions, proper markings, and safe gameplay.
This guide covers everything you need to know—court size, boundary lines, key measurements, markings, diagrams, and best practices.
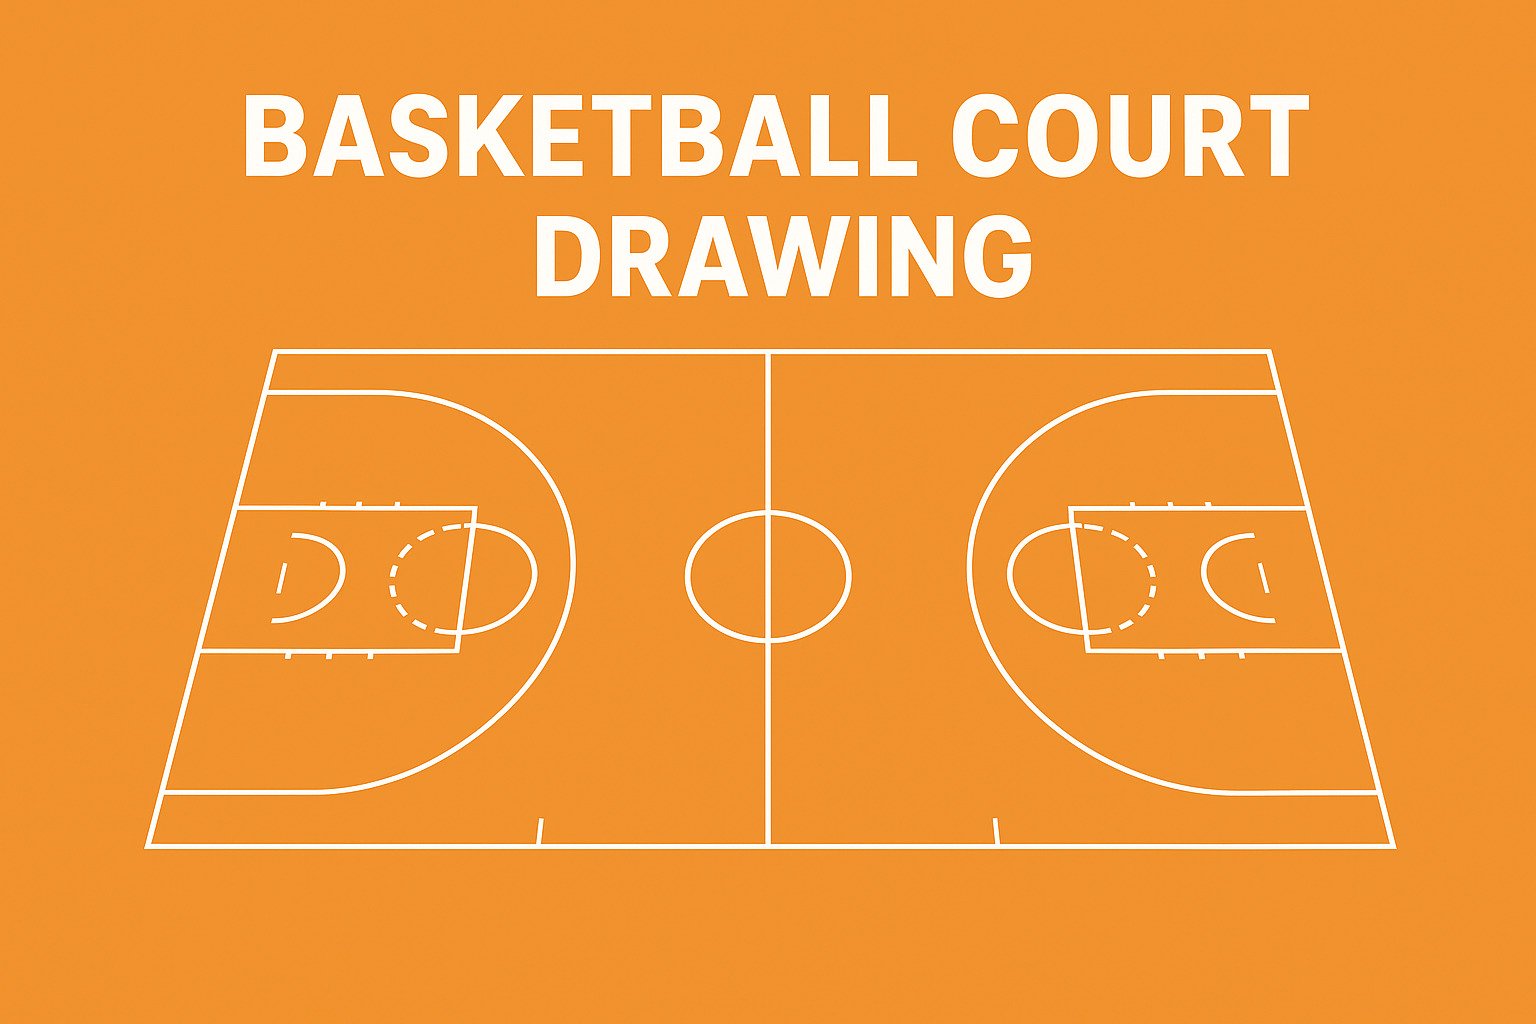
What Is a Basketball Court Drawing?
A basketball court drawing is a scaled visual plan that shows the layout, markings, and dimensions of a basketball court. It includes:
- Court boundaries
- Center circle
- Free-throw lane (key)
- Three-point lines
- Restricted area
- Backboard and rim placement
- Bench & scorer’s table locations (optional)
This drawing acts as the blueprint for accurate installation and sports flooring work.
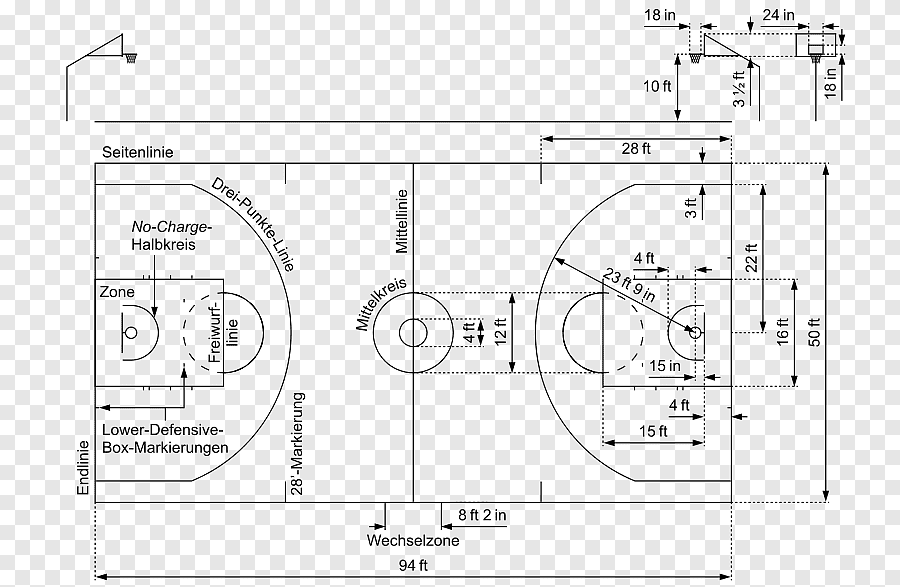
Standard Basketball Court Dimensions
Basketball courts differ by level of play. Here are the official dimensions:
1. NBA Court Dimensions
- Court size: 94 ft × 50 ft (28.65 m × 15.24 m)
- Three-point line: 23.75 ft from the basket (22 ft in corners)
- Free-throw line: 15 ft from the backboard
- Center circle: 6 ft radius
- Restricted area: 4 ft arc
2. FIBA Court Dimensions
- Court size: 28 m × 15 m
- Three-point line: 6.75 m from the basket
- Free-throw line: 4.6 m from the backboard
- Center circle: 1.8 m radius
3. High School Court Dimensions
- Court size: 84 ft × 50 ft (25.6 m × 15.24 m)
- Three-point line: 19.75 ft
- Free-throw line: 15 ft
Key Elements in a Basketball Court Drawing
1. Sidelines & Baselines
These are the outer boundaries of the court.
- Sidelines: Longer edges of the court
- Baselines/Endlines: Shorter edges under each basket
2. Center Circle
Used for the opening jump ball.
- Typically 6 ft radius (NBA) or 1.8 m radius (FIBA).
3. Midcourt Line & Restraining Circle
The half-court line divides the court into two equal halves.
4. Free-Throw Lane (The Key)
Consists of:
- Free-throw line
- Lane lines
- Painted area
NBA key width: 16 ft
FIBA key width: 4.9 m
5. Free-Throw Circle
- Radius: 6 ft (NBA high school) or 1.8 m (FIBA)
6. Three-Point Line
A crucial scoring zone.
- Curved arc at standardized distance based on level of play.
7. Restricted Area
A semi-circular arc located under the basket.
- Helps avoid defensive blocking fouls within the restricted zone.
8. Backboard & Rim Location
- Rim height: 10 ft
- Backboard: 6 ft × 3.5 ft
- Overhang: 4 ft from the baseline
9. Player Bench & Scorer’s Table
Optional but recommended for high-level courts.
Basketball Court Drawing: Step-by-Step Process
Follow these steps to create an accurate and professional court layout:
Step 1: Choose the Court Type
Select whether your court follows NBA, FIBA, or High School standards.
Step 2: Mark the Outer Boundary
Draw the main rectangle based on the dimensions chosen.
Step 3: Add the Midcourt Line & Center Circle
Divide the court equally and draw the central circle.
Step 4: Draw the Free-Throw Lane
Include lane lines, the free-throw arc, and hash marks.
Step 5: Draw the Three-Point Arc
Use precise radius and distance measurements.
Step 6: Add Backboards, Rims & Restricted Area
Mark the space under the basket with correct positioning.
Step 7: Add Optional Elements
- Team bench areas
- Coach boxes
- Scorer’s table
- Substitution zone
Step 8: Label All Measurements
Every line, arc, and zone should show dimensions for clarity.
Basketball Court Drawing Diagram (Text-Based)
Why Accurate Basketball Court Drawings Matter?
✔ Ensures proper court measurements
✔ Helps avoid installation mistakes
✔ Supports professional and school-level gameplay
✔ Assists contractors & flooring companies
✔ Improves court safety and playability
Accurate drawings help standardize gameplay and ensure athletes get a professional experience.
Tips for Creating Professional Basketball Court Drawings
Use AutoCAD, SketchUp, or CorelDRAW for precision.
Follow FIBA/NBA measurement standards.
Leave space for run-off areas (recommended 2–3 ft).
Consider flooring material compatibility.
Use contrasting colors for key zones.
Common Mistakes to Avoid
❌ Incorrect three-point radius
❌ Misaligned free-throw circles
❌ Using non-standard measurements
❌ Forgetting the restricted area arc
❌ No buffer space outside boundaries
Conclusion
A well-designed basketball court drawing is essential for accuracy, performance, and safety. Whether you’re planning a small school court or a professional indoor stadium, having a detailed and properly measured layout is the foundation for a high-quality court.
Use the guidelines, dimensions, and step-by-step instructions in this article to create a court layout that meets international standards and enhances the overall playing experience.